Walkthrough:
On the home page of the Outfield Platform, click on the orchard that you want to generate a flight plan for.


This will take you to the orchard management page. From here you can view reports, edit the orchard and generate flight plans. Click on the “Flight Plan” button to get started.


There are two kinds of flights, interval and top down.
Imagery captured from the interval survey is used for calculating fruit loading, blossom variability and yield estimates. Imagery from the top down survey is used to create tree size maps and to do things like identify missing trees.
For this example we’ll go with an interval survey, click on “Download”. When you click download the outfield web app generates a flight plan on the spot based on your orchard boundary and other information provided.


When the flight is downloaded, click the Litchi button, which takes you to flylichi.com. Litchi is the app that Outfield uses to control the drone. Missions from your Litchi account will show up on the tablet that you take to the field.
You can think of this site as your missions hub. Here, you can import and save flight plans for the drone to carry out in the field.
Hover over “Missions” in the bottom left hand corner then click “Import”


Click “Browse”, then select the flight plan that you downloaded from the Outfield Platform. Once selected, click “Import to new mission”


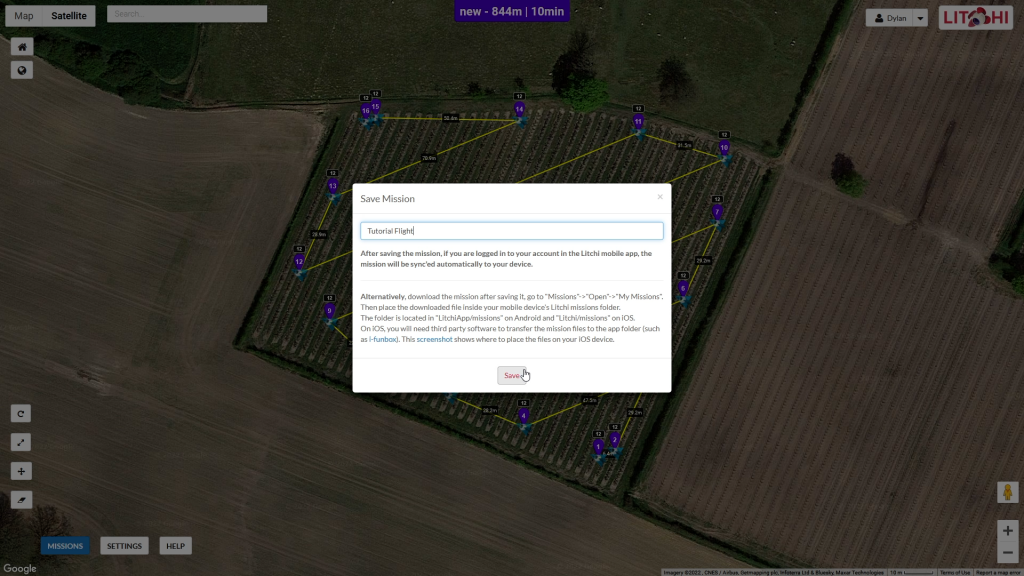
Once the flight plan is imported you can see the path that your drone will fly over your orchard.


If you’re happy with it hover over “Missions” again and click “Save”


You will then be prompted to enter the name of the mission. Type in a mission name that is self explanatory and easy to understand. Once that’s done, click “Save”


Your flight setup is done!